How To – Recommission a classic motorcycle

December 27, 2024
Difficulty

What Do I Need?
A classic motorcycle, obvs
Basic tools – spanners, sockets, screwdrivers, pliers etc
Basic spares – gaskets, filters and spark plugs are a good place to start
Oil drain pan
Fresh fuel and oils
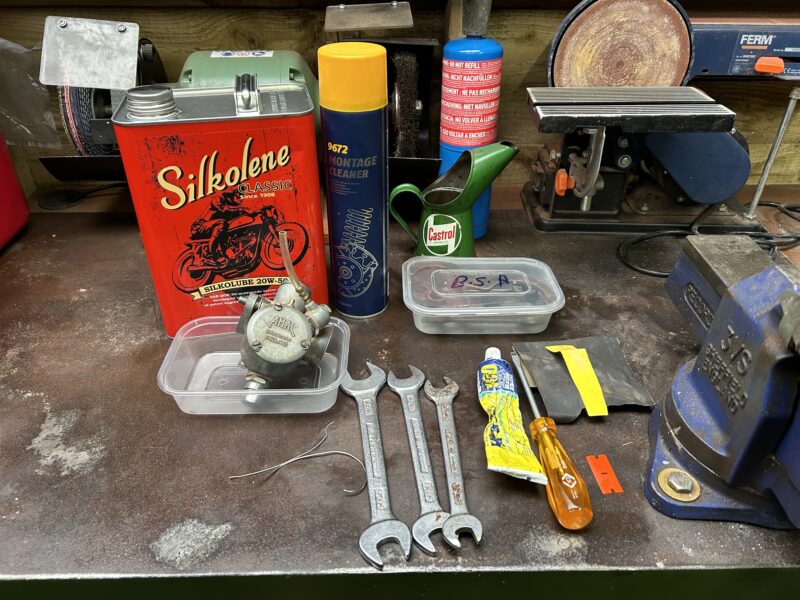
An ultrasonic cleaner, if you’re feeling fancy (but not essential) – brake/carburettor cleaner will do
A rudimentary grasp of the internal combustion engine – a decent workshop manual goes a long way
A stout pair of boots – these old bikes have a nasty habit of kicking back
Why Should I?
Machines don’t like to sit idle, and that very much includes your classic motorcycle.
At Car & Classic, we’re huge advocates for using your classic cars and motorcycles as much as possible. They’re at their happiest when regularly exercised, keeping fluids moving, tyres rotating and electrical connections firing. Mark our words, a well-used, well-maintained vehicle almost always proves less hassle in the long run.
But alas, sometimes life gets in the way and we’re probably all guilty of having too many projects on the go from time to time, meaning a vehicle can be left to languish in the shed or driveway for a little longer than we’d like.
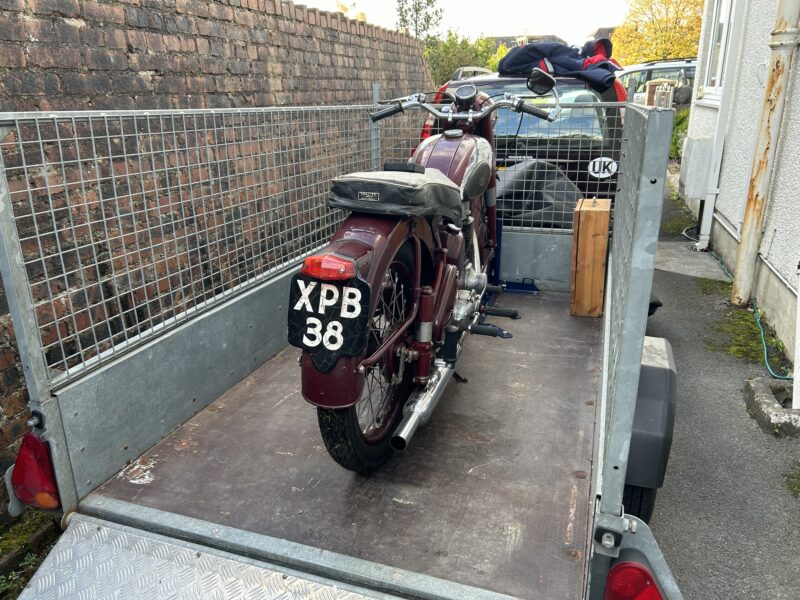
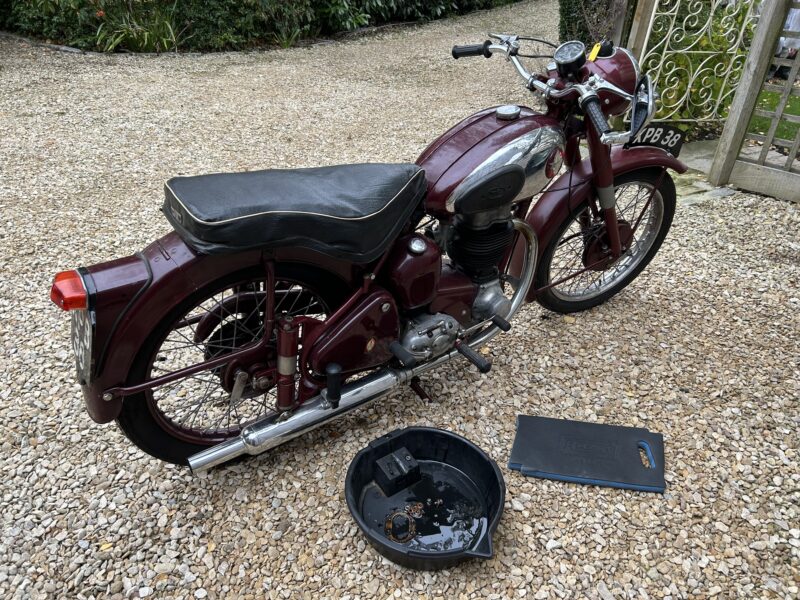
In the case of my classic motorcycle, it was letting this 1955 BSA C11G hibernate in my aunt’s summerhouse since 2021. A recent family reunion presented an opportunity to extract the bedraggled Beezer from its garden dwelling.
Upon reacquainting myself with the bike, it looked a little more sorry for itself than I remember. An intoxicating waft of petrol greeted me upon opening the door to the summerhouse, signalling that the incontinent old sledge had dropped the last of its fuel (and all four pints of its Castrol GTX) onto the floor. Mercifully, a judiciously placed drip tray took the brunt of it.
So, bike loaded, towed and now cluttering my parents’ shed – it’s a wonder my family puts up with me – the long-overdue recommissioning was ready to begin.
Talk Me Through It
1) Check the engine turns freely
How you approach this should be influenced by how long the bike has been standing. Assuming there’s some oil in it, try turning the engine over gently using the kickstarter. It should spin smoothly and freely. We’d also recommend you disconnect the fuel supply before you start. There’s no sense in pulling any nasty petrol into the carb.
If the spark plug is left in, there should be some resistance, signifying the engine has good compression. But any untoward noises or excessive tightness could indicate something has seized within the engine. To avoid damaging vital internals like the piston rings, it’s best at this point to halt the recommissioning process and delve deeper into the engine. Speak with an expert if you’re not sure.
Old British bikes with a dry-sump lubrication system have a habit of ‘wet sumping’ if left to stand for a long time. This is when engine oil flows past the oil pump gears and collects in the crank sump. Even if the oil hasn’t leaked out, it’s prudent to take the sump plate off and see what comes out. With this sort of system, too much oil in the engine can be as problematic as not enough oil.
More than a year sat idle and the BSA had marked its territory. So I drained the sump, cleaned the gauze filter, reassembled it with fresh gaskets and changed the oil in the reservoir. Yes, oil changes are best performed with a warm engine, but in this case there was hardly any in there to start with! I’ll perform another oil change once it’s back up and running so as to remove any residual nasties from the system.
2) Spark
A petrol engine isn’t going anywhere without one. In the case of this old BSA, the spark comes courtesy of a coil, points and condenser – a boon to us uninitiated in the dark arts of the magneto. The easiest indicator of a strong spark is to remove a spark plug from the cylinder head, reconnect the high-tension (HT) lead and touch the ground electrode to the cylinder head. Turn the engine over and look for a spark jumping across the plug gap. Use this opportunity to assess the condition of the plug; it can tell you a lot about the health of your engine including wear, firing issues or sub-optimal air/fuel mixture. Replace and be sure to re-gap if necessary.

I got lucky this time around. The plug was nice and clean and produced a huge spark. If you’re not so fortunate, check the electrical connections and clean the points. These often fur up during storage. Ignition components do have a finite lifespan, so replace as necessary.
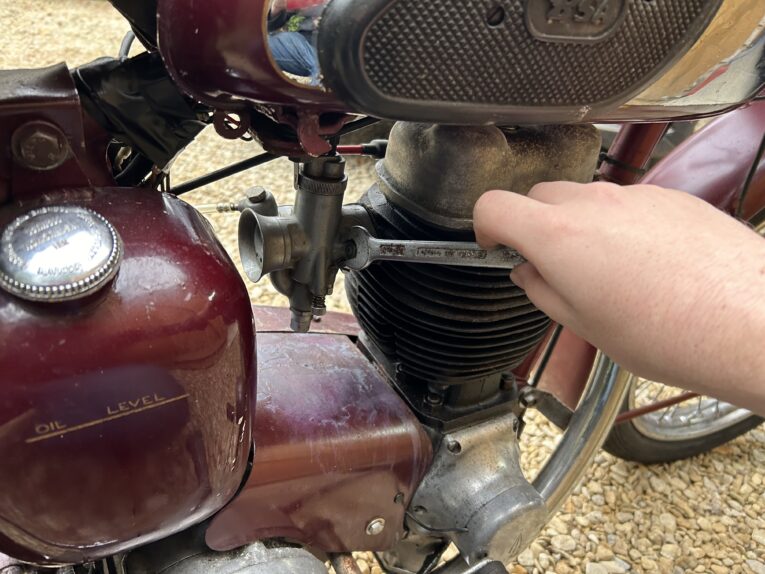
3) Fuel/air
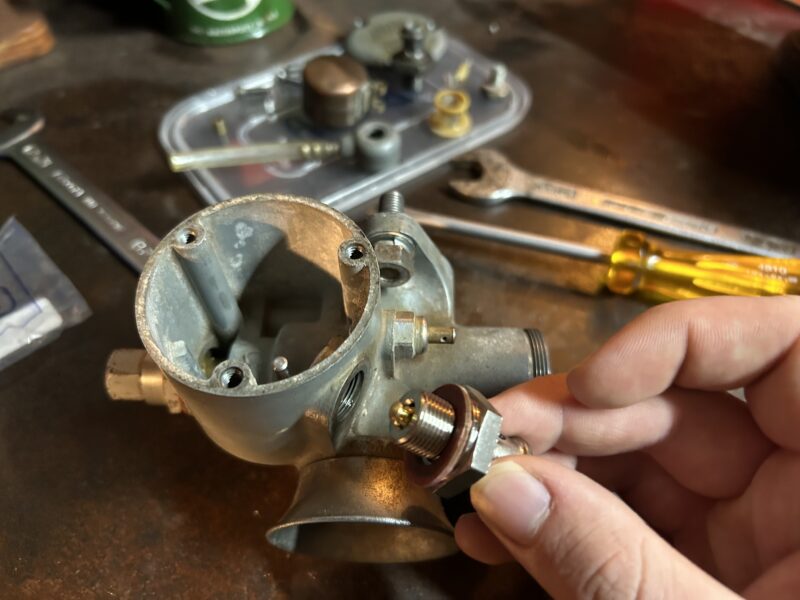
Here comes the fiddly bit. Carburettors can infuriating to deal with, but if you’re careful and methodical, it needn’t pose a big headache. The Ethanol in modern fuel is the enemy of this older equipment, so steering clear of E10 would be our advice. Also, be sure to dispose of any residual liquid in the tank safely before any attempt to restart the engine is made and assess the condition of the tank’s innards. This is also a good opportunity to check your fuel tap works. If the seals are allowed to dry out, taps often fail and this could cause petrol to flow into the engine, past the piston rings and collect in the crank case.
After replacing the fuel hose and putting fresh juice in the BSA’s tank, the carburettor immediately flooded and poured petrol all over the floor. Fortunately, the fuel tap works well so I was able to stop the flow and investigate the issue.
If this happens to you, remove the screws securing the float chamber and check that the float rises and falls smoothly, with little effort. A sunk or stuck float will stop the needle valve from controlling the flow of petrol into the carb. They’re gravity-fed, so the flow of fuel will continue until the needle seats. Check that your float does indeed float by removing it carefully from the spindle. Take it into the bath with you if you like. Hey, we’re not judging.
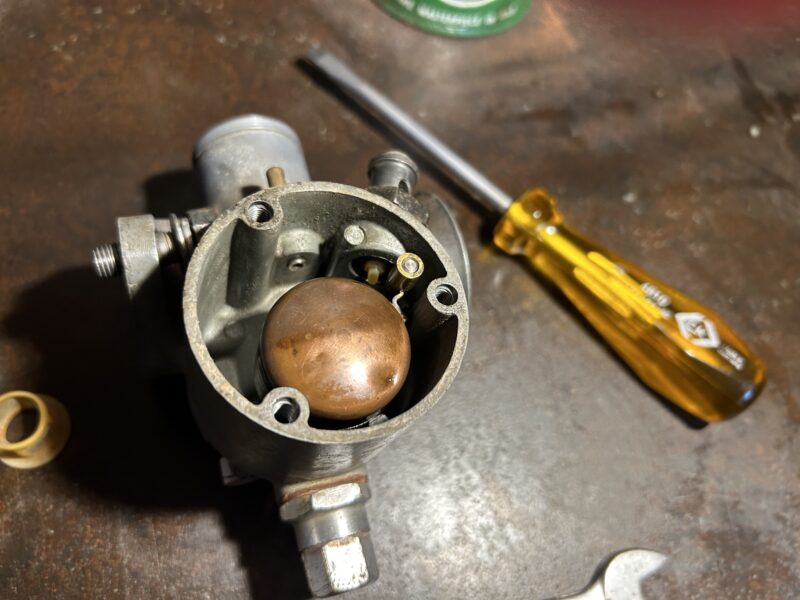
In my case, the float was bobbing up and down admirably, but the needle controlling the flow of petrol into the carb wasn’t playing ball. It looked like our old nemesis ethanol was to blame again, eroding the little nylon so that it was sticky and no longer seated properly. Replacement (OEM upgraded) needle and seat kit were ordered and fitted. But the float still wasn’t providing enough lift to stem the flow of petrol, so I made up the difference with a lump of solder. Some floats are adjustable, but not this one.
If you’re going to the trouble of dismantling a carb, give it a deep clean while you’re in there. Remove and blow through the jets. An airline or ultrasonic cleaner makes this much easier, but an aerosol can of carb cleaner will usually get you out of trouble. If you know the engine was running happily prior to standing (as I did in this case), don’t mess with the air/fuel mixture settings. Even if they’re out, they’re not likely to be far wrong as a starting point to get the engine running again.
4) Cross your fingers and kick
Right, you’ve got compression, lubrication, spark, air and fuel. Now for the bit you’ve all been waiting for. Give it a kick and see what happens. With any luck, you’ll have coaxed the engine back into life. Remove the oil reservoir cap and check the engine oil is circulating back to the tank. It should maintain its level and provide a constant drip from the return pipe. This is vitally important. Any issues, turn it off immediately. If all is well, warm the engine up gently, and you’ve got yourself a runner! Classic motorcycle recommissioned!
Conclusion
Recommissioning a classic motorcycle that’s spent a long time off the road can throw a lot of curveballs. This ‘How to’ guide has only really covered a best-case scenario, but don’t let that put you off having a go. Old British bikes like this single-cylinder BSA C11G are about as simple as they come.
So get those service kits on order and put aside a weekend to get that bike back on the road. Don’t have a classic motorcycle of your own? Well, Car & Classic has you covered…