How To – Replace Your Radiator

March 27, 2023
Difficulty

What Do I Need?
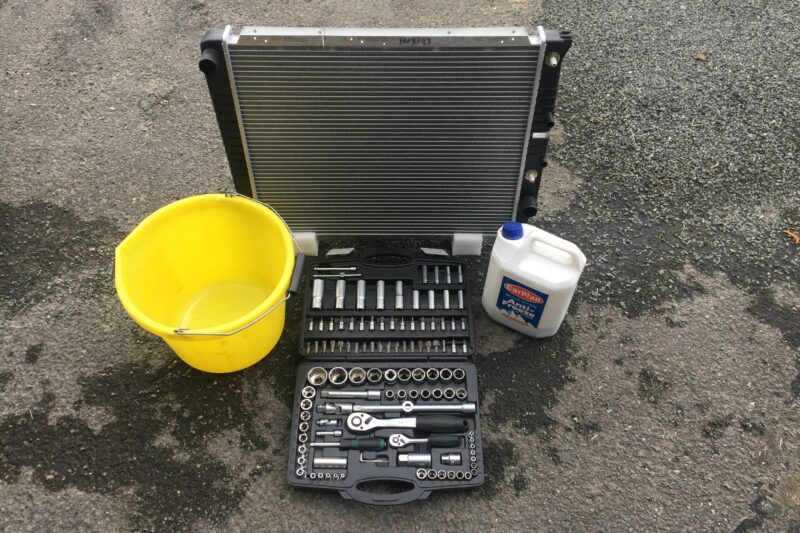
Some basic hand tools (sockets, screwdrivers, pliers etc.)
New radiator specific to your vehicle
Fresh coolant/anti-freeze specific to your vehicle
Drain pan or bucket
Funnel (optional)
Why Should I?
Regularly inspecting every aspect of your car’s cooling system should be part of your routine maintenance schedule and the radiator is a hugely important part of that system. Basically a heat exchanger, the radiator systematically transfers the heat of the hot water coming from the engine to the atmosphere by allowing cool air to pass over it, whether that be from driving or the car’s fan.
Any damage, blockages or leaks can be detrimental not only to the efficiency of the system but also to the general health of your engine due to overheating. Coolant will deteriorate over time and so if not regularly replaced its rust-inhibiting properties will be drastically reduced causing your radiator to corrode from the inside. The rad’s location at the front of the engine bay also makes it susceptible to damage and those tiny cooling fins are flimsy at the best of times. If your radiator is full of brown sludge, is visibly damaged or leaking then it’s time to pop a new one in. It’s a pretty simple process too and one that you can easily tackle yourself at home, so let’s get cracking.
Talk Me Through It
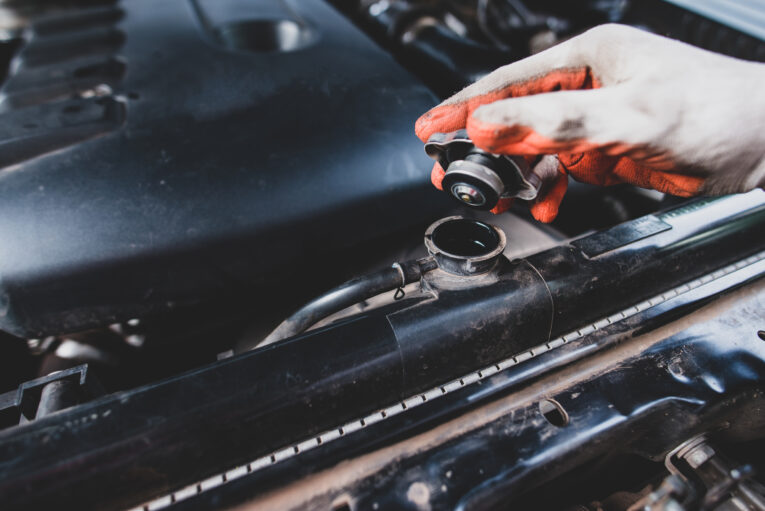
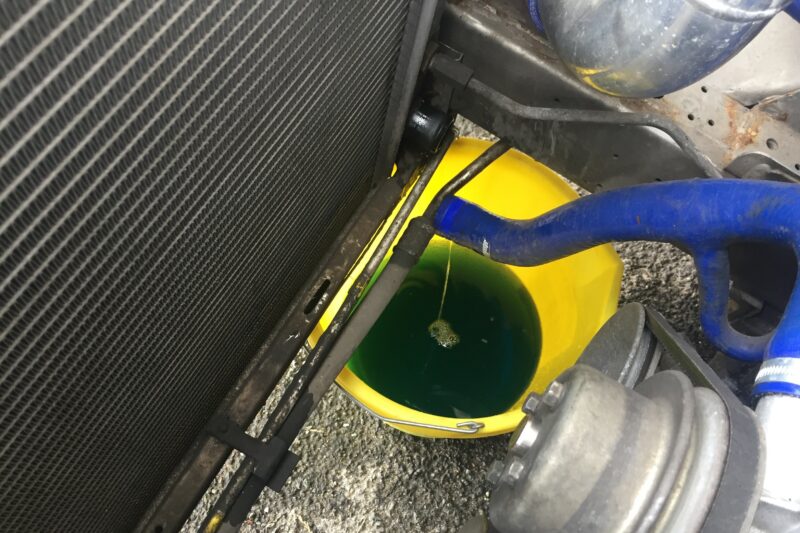
1) Make sure you have room under the car to place a bucket or drain pan and with a cold engine drain the coolant from the system via the drain plug (if present) or the lowest part – usually the lower radiator hose.
2) Remove the fan shroud (if present) and disconnect all of the various hoses, feeds and breather pipes from the radiator. Inspect them for damage/deterioration, as well as all of your jubilee clips and fixings and replace as necessary.
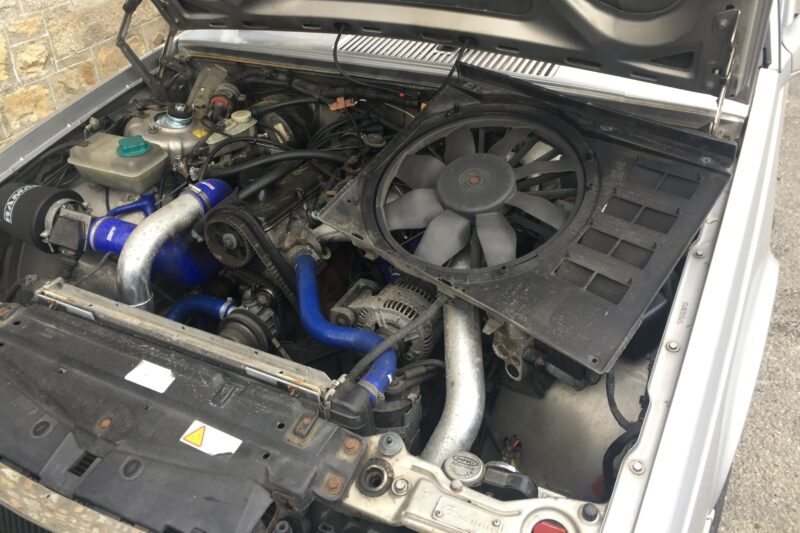

Our radiator had additional fittings for automatic transmission cooling
3) Undo all of the fixings and bracketry holding the radiator in place. Depending on the setup of your particular car you may need to remove the fan too.
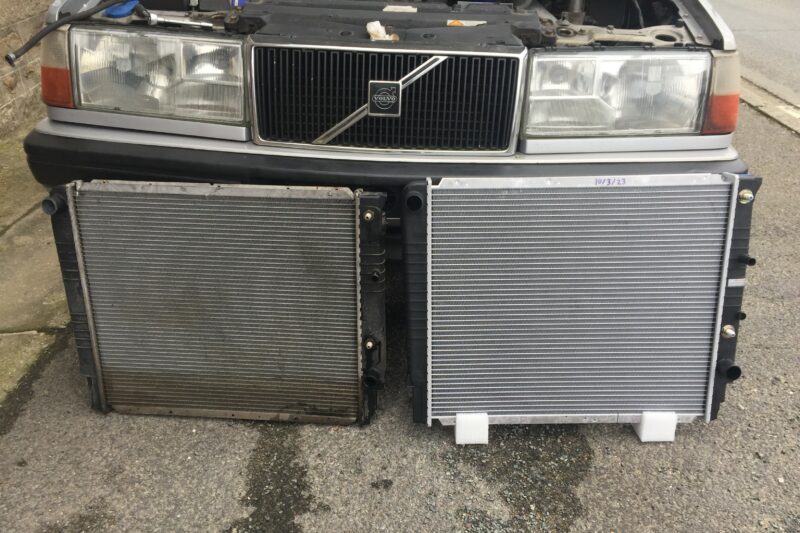
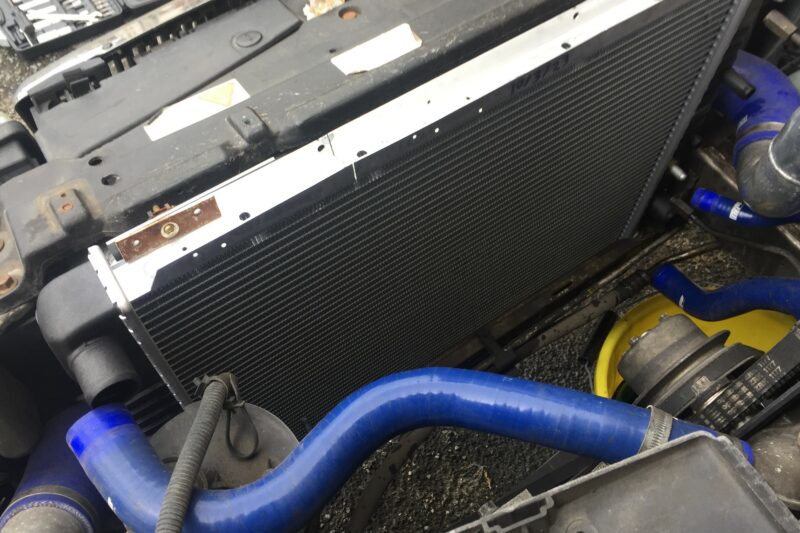
4) Remove the radiator from the car.
5)Transfer any hardware, mountings or cushioning to the new radiator before fitting into place and torquing to spec.
6) Reinstall all of the hoses (with new clips if necessary), fan (if removed) and shroud and refill the system with the correct coolant for your particular application, checking for any leaks.
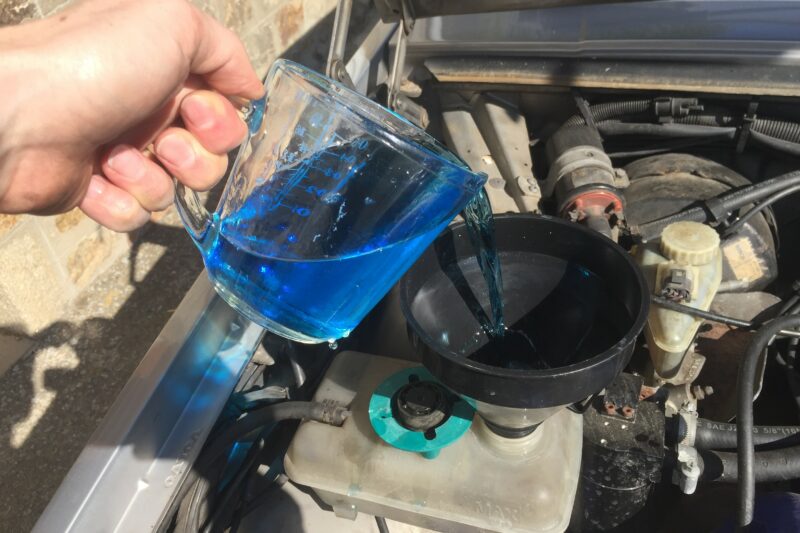
7) Run the engine with the radiator/expansion tank cap off to purge the system of any air – you will see it bubble and cough as the air is released. As the fluid level drops, top up with fresh coolant until all of the air has been expunged and the fluid is at the correct level, then replace the radiator/expansion cap.
8) Go for a drive and monitor the temperature gauge. Check again for any leaks and continue to top up the coolant regularly over the next few days as required.
Conclusion
A clean, properly functioning radiator will do wonders for the efficient operation of your classic car’s engine. They are relatively inexpensive items in the grand scheme of things but aftermarket options will generally be cheaper and work just as well if you’re budget conscious – it’s a pretty basic bit of kit after all, so go and have a look at yours now. Take off the cap and assess the condition of the coolant, have a good look at the fins for any damage and if you’re regularly having to top up your expansion tank then chances are you could have a leak. Thankfully though, with this handy guide you’ll now be well equipped to bung a new one in so you can keep your classic running and enjoy many more miles of happy motoring.